Pages

Search This Blog

Showing posts with label mixing. Show all posts

11.02.2012

Mixing Acoustic Guitars


Acoustic guitars are one of the most dynamic and expressive instruments used in modern music. They have a broad frequency range covering almost the entire audible spectrum. The instrument can serve many different roles in an arrangement as a harmonic, melodic, or percussive element. All of these factors will affect how you approach both the recording and mixing acoustic guitars.

Context
The first thing to do is think about its role in the song/mix. Is the guitar the main harmonic instrument? Is it supposed to enhance or thicken other harmonic instruments like electric guitars? Is it enhancing the melody, playing arpeggios or single notes? Is it a percussive element more like a shaker just to fill out the rhythm section? Figure out the goal, then you can begin processing.

Tone control
Depending on the guitar, microphone, pick, player and role in the arrangement, acoustic guitars always require at least a little equalization to fit in a mix. Cutting of nonmusical sub frequencies (everything below 100Hz) is a must. A low shelf may be required to tame the remaining low-end. In the midrange, take out any unflattering frequencies causing 'boxiness' or anything that might mask the vocals. A broad, gentle high shelf boost can enhance articulation and an overall more sparkly sound. The general strategy is to remove what you don't need, then enhance what you do.

Dynamics
An acoustic guitar performance is often extremely dynamic, which is often a problem. A compressor will even out the differences between loud and soft notes and help keep the level more constant throughout the track. It's easy to take it too far, so keep the gain reduction to no more than 3-4dB. The compressor's attack control will allow you to clamp down on the beginning of the notes, or when set slower (about 20-50ms) will enhance the transient which helps it stand out more in the mix.

At this point you may want to adjust the sound envelope further though use of a transient shaper. This tool can increase or decrease pick attack, and separately adjust sustain.

Depth
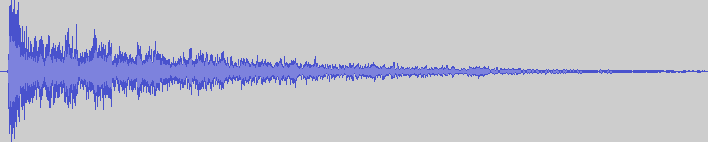
Sending your acoustic track(s) into a stereo reverb will add space and distance to the sound. The trick here is to not wash out the sound in a ton of reverb, but just to move the move the mics back a bit into an imaginary room. Usually, a short room type verb with the highs rolled off is the best bet. Try to make the reverb sound like an office or large bedroom - short decay with and a bit of early reflections. The predelay control will separate your source from the room.


Summary
And so, following the above strategy you should now have an acoustic guitar track with a balanced frequency response, even dynamics and sense of space around the instrument, (if that was what the track required). The track is ready to be put in the mix with the other instruments. Tweak the EQ in context with the other tracks, adjust the reverb send amount, and even EQ the reverb if needed.

Examples
Acoustic Raw
Acoustic Processed

10.15.2012

Featured Equipment: IK Multimedia Total Studio 3 software bundle

IK Multimedia Total Studio 3 software bundle
The Total Studio 3 bundle is the most complete solution for any DAW available on the market today, with a collection of 8 award-winning plug-ins, including 5 virtual instruments and 15 multi-sampled instrument Xpansion Tank 2 titles, plus 3 essential effects plug-in suites — with over 170 accurately modeled effects — covering every guitar, bass, mix and mastering need. The bundle is available at an amazing price that’s 80% lower than the cost of buying the components individually.
Find out more: Total Studio 3

The Total Studio 3 bundle includes:

Virtual Instruments and Sounds:
  • SampleTank 2.5 XL
  • Sonik Synth 2
  • Miroslav Philharmonik
  • SampleMoog
  • SampleTron
  • 15 Xpansion Tank 2 Multi-Sampled Instrument Collections
Guitar & Bass Gear:
  • AmpliTube 3
  • including:
    • AmpliTube Jimi Hendrix™
    • AmpliTube Metal
    • AmpliTube Custom Shop
Mixing & Mastering:
  • T-RackS 3 Deluxe
  • Mastering Suite
  • CSR - Classik Studio Reverb
Get IK Multimedia Total Studio 3 at Revolution Audio

5.16.2012

Long Distance Music Collaboration


I recently started a long distance collaboration project with a friend in Australia. It's going well but it took a little while to get workflow and organization figured out. There are different considerations than I normally deal with day to day in a studio with musicians coming here. We're both recording and mixing as we go and transferring a lot of files back and forth, taking turns adding parts.
This article will go over some of the things to consider when doing long distance music collaboration.
Collaboration Screenshot
Use the same DAW
If all collaborators are using the same DAW it makes things much easier. Use the stock plugins wherever possible. Pro Tools, Logic, Cubase, it doesn't really matter which one but it's a big advantage to use the same one. We chose to do these projects in Reaper as this is my main DAW and one Joel has been wanting to learn, and can demo free.


Transferring files and backup
Normally I would recommend Dropbox for collaboration, I've used it before and actually ran the projects right from the shared folder. It's nice because you don't have to worry about transferring or backup. Because this project is going to be 4-6 songs we'd likely run out of space quickly especially when we get real drums on the songs. So for this project I just set up an FTP account and use the storage that comes with my website. Backup is taken care of automatically as all files are now saved in 3 places.


Versioning
For each turn in the project as it gets passed around gets a new version number. "Project 01-4" would be the forth time something was done on the project. Doing a "save as" for the project file avoids confusion as to which is the most recent. We're keeping it simple but you could take this further, odd numbers for you and even version numbers for the partner.


Printing FX
It's unlikely that you'll have an identical system and set of tools as your collaborator. You will want to use the best or most familiar tools you have available to get the best sounds. To make this more collab friendly, you have to commit and print these effects as audio files. Sometimes that means using the freeze or render function, or routing the audio internally to a new track. You don't have to delete the originals of course, but if it sounds good why not just stick with it? For our project this means rendering the virtual drum patterns as audio files, and printing my special reverbs as audio.

DI Tracks
Similar to the above, with guitars and bass with virtual amps, it's likely you will want to tweak or completely change the sound later on as the ideas turn into a song. Even if you're recording with amps and mics, splitting the signal with a DI will give you both options or at least a backup.


Communication
One thing we've found to help keep excitement and momentum for the project is all the ways we can communicate these days. We use Twitter, Facebook, email, and Instagram to talk about the project share photos and prod one another if we're taking too long for a turn. It's a lot of fun and we're pushing each other to play better and be more creative.

Don't let geography get in the way of music making. Find people you want to work with and just do it. Be open to experimentation, play your best and be honest with your partner. Most of all have fun.

5.09.2012

Alan Parsons Master class recording workshop in Toronto

On May 26th at Noble St. Studios in downtown Toronto, a very cool event is happening. GlobalMusicDepot is putting on the Alan Parsons' Master Class and Training Session.

It's a one of a kind studio session with legendary producer Alan Parsons, a team of pro players in one of Toronto's top studios.

This limited seating event isn't free of course, GOLD level admission costs $400 and gets you a seat in the Noble Street lounge with A/V feed of the event. The PLATINUM level ticket for $800 you get into the control room with Alan as the magic happens.
Both ticket levels include the $150 value Art & Science of Sound Recording 3 DVD set.

Order GOLD level admission to Master Class
Order PLATINUM level admission to Master Class.


Global Music Depot is proud to announce the first Canadian Master Class Training Session with Alan Parsons, at the fabulous Noble Street Studios in Toronto on May 26, 2012.
Attendees of this incredible experience will have the rare opportunity to participate in a recording session with the legendary Alan Parsons in the producer’s chair. Session musicians for the event feature the acclaimed Toronto band, the David Barrett Trio (plus one).
This 1-Day hands-on session is suitable for those with some knowledge of DAW recording and experience as musician, engineer, or producer.  Also fitting for music production/recording students and home studio enthusiasts.  Live tracking; vocals and basic mixing will be covered.  Attendees get to witness all stages of a recording session with Alan Parsons, from tracking to overdubs (including lead and backing vocals) to mixing.
All attendees will receive a free copy of the Alan Parsons’ 3 DVD set – The Art & Science of Sound Recording (Retail Value $149.99) as well as a “By Invitation Only” ticket to the evening’s VIP “Meet & Greet” event. 
Alan Parsons has been conducting these Master Classes for the past 3 years and they consistently sell out!!  GOLD-level seating is extremely limited.  Don't delay!

Here's a video recap of the recent LA Master Class session

4.03.2012

Featured Equipment Of The Week: Radial MC3 Monitor Controller

Radial MC3 Monitor Controller 
The Radial MC3 monitor controller is a studio tool that enables the engineer to quickly select between reference monitors, sub woofer or headphones and compare how the mix translates via various playback systems. Unique to the MC3 is the ability to quickly sum mono for AM radio compatibility.
And while most monitor switchers are active the MC3 is 100% passive. This means that unlike active switchers that introduce a buffered electronic circuit in between your recording system and monitors, the MC3 delivers straight wire performance. This eliminates coloration and distortion for more accurate monitoring.
Find out more: Radial MC3 Monitor Controller

 Top Features:
  • Passive studio monitor switcher with headphone amp
  • Control two sets of monitors and sub woofer
  • Mono sum for AM radio compatibility and phase check
  • Individual 'set & forget' controls to fine tune levels
  • 14 gauge steel chassis & outer shell, baked enamel finish 
The Radial MC3... passive, simple and effective monitor control for the masses!

3.01.2012

Modulation Effects Explained

Modulation Effects Explained
Modulation effects are a great way to create movement within a mix. This article will explain the different types of modulation effects available for mixing.

  1. Tremolo
  2. Vibrato
  3. Flanging
  4. Phase Shifting or Phasing
  5. Chorus

All of these effects are built around a Low Frequency Oscillator more commonly referred to as just an LFO. An LFO is an audio signal usually less than 20Hz that creates a pulsating rhythm rather than an audible tone. These are used for manipulate synthesizer tones, and as you will see, to create various modulation effects. All the effects listed use Sine wave as the waveshape for the LFO.

2.21.2012

Featured Equipment Of The Week: AKG K702 Premium Open-back Headphones

AKG K702 Premium Open-back Headphones
The K 702 are the new reference for open-back dynamic AKG headphones. They combine an extremely accurate response with yet unseen agility and spaciousness. This is achieved by using revolutionary flat-wire voice coils and a patented Varimotion™ two-layer diaphragm. A totally open design and a high performance cable complete these reference headphones.
Their comfortable, specially shaped “3D-form” ear pads and a padded genuine-leather headband ensure a perfect fit. They are individually tested and numbered.
Find out more: AKG K702 Premium Open Back Headphones
 
TOP FEATURES

 • Revolutionary flat wire technology
• High performance neodymium magnets
• Patented Varimotion 2-layer diaphragm
• Detachable professional cable
• Unique and replaceable heavy duty 3-D cut ear pads
• New soft cushioned genuine leather headband
• Pre-selected transducers
• Individually tested and numbered
• Made in Austria

AKG K702 studio headphones are available at Revolution Audio

2.16.2012

Using Guitar Pedals For Mixing

Today I have a quick tip that can make mixing a lot of fun.
Use guitar pedals for mixing

Plugins are great but its just not the same as running sounds through real analog circuits. You can send sounds out of your audio interface, tweak the pedal settings and even 'play' the pedal to do realtime automation. It can be a lot of fun to work this way.

For the demonstration I've recorded an electric guitar directly into my DAW with Amplitube for amp and cabinet simulation. I'm going to then run the signal through an Electro-Harmonix Memory Boy analog delay pedal.

Here is the sound of the direct guitar.
Direct Guitar
Here is the guitar with the Amplitube plugin added (stereo, amp+speaker+mic)
Guitar + Amplitube

Now I'm going to run the sound through the pedal. To do this in your home studio you need an audio interface with a couple spare analog outputs, if your interface has 4 analog outputs, that's perfect.
Connect a guitar cable from output 3 of the interface to the input of the pedal. Connect the ouput of the pedal to one of the instrument inputs of your interface (usually in 1 or 2). In this case, I'm going from output 5 through the Memory Boy and into input 1 of my Profire 2626.

In the DAW you need to tell the signal where to go. Most DAWs will have a plugin for hardware inserts. In this next example I have the hardware insert before the amp, just like if I had the pedal before the amp. When you do this remember to keep the mix control of the pedal to about 50% or less, you still want to have the clean guitar get through.
Hear how it sounds with the delay before the amp
Guitar + analog delay insert

There's another way to use pedals and that's as a separate FX track. Add a new mono track to your project. You can either use the the hardware insert plugin again and have the other tracks send to this track, or set the track to monitor the analog input and have the other tracks send to the analog output.

Here I have the guitar track sending to my delay track, which has the hardware insert plugin set the same as before. The direct guitar signal goes into amp plugin, then to the master output. The signal from this track is also going to the delay track. It then goes into the insert plugin, out the interface, into the delay, (set to 100% wet, no clean sound) and then into the interface and to the same track. I hope this makes sense. The benefit of doing it this way is you can blend in as much of this signal as you want. You can also use plugins before and after to shape the sound independently of the original tracks. Also, you can send multiple tracks in at the same time.

Here is the guitar through the delay as a send. (delay after the amp in the chain)
Guitar + Delay Send

And finally, here is what the delay track sounds like soloed.
Delay Return Soloed

I hope this has been helpful.

1.17.2012

Hand Percussion Recording Tips

A box of hand percussion instruments is one of the best investments you can make for your home studio. Shakers, rattles, tambourines and other clicky things can be added to just about any style of music from folk to electronic to heavy metal (hear White Zombie for proof of tambourine in metal).

You can these instruments to fill out sparse arrangements, increase energy in a chorus or to add emphasis to certain beats.
 
Once you start building your collection it's hard to stop, most small percussion instruments are inexpensive and many you can make yourself. Having a variety of options will get you closer to the ideal sound for each song and minimal processing after recording.

As with any musical instrument, there is more to playing percussion than just shaking or smacking it. Even the humble egg shaker is capable of a variety of distinct sounds just by changing hand position. I recommend watching some videos on YouTube for egg shaker, maraca, and tambourine for ideas and techniques.


One of the most important things in getting a natural sound from shakers, tambs etc is distance. Ideally you record the performance in a large space with not a lot of acoustic treatment. Hang the mic up high above the player pointed down. I have compared recording a shaker overdub in my control room vs the hallway outside with tile floor and it was dramatically different. Having the reflections from the floor and walls helped create a more 3D sound even with one mic. Placing acoustic treatment behind the mic or on the sides around the mic sucks all the life out. Any shaker tracks I've recorded close and in dryer environments (acoustically) have had a harsh, scratchy sound and were much harder to fit in a mix.

If you do prefer the sound of a close miked percussion performance play across the mic, rather than directly towards it for a more even low and mid frequency response.

Experiment with microphone options, condensers and dynamics will bring out drastically different qualities in percussion. Condensers at a distance will capture a more realistic sound, FET models will pick up the fast transients more accurately than tube models. Dynamic mics react much more slowly and have a less accurate but still very usable sound. Combining a few types of mics may help get you the perfect sound.


For music styles like indie rock, an audiophile quality recording of a tambourine isn't going to be very helpful, you're just going to have to distort and filter it later! Instead, experiment with different mics, tape recorders, toy mics and effect pedals to make things nasty. Besides being a lot of fun, it can be exactly what the song needs.

For processing these tracks I like short delays and reverb to create a doubling effect but it all depends on what the role of the percussion is in the arrangement, whether it should be drawing attention or just adding texture. Close miked percussion tends to need more processing especially if you want it to sound natural (you see the contradiction there?). Using high and low cut filters to limit the spectrum to only whats necessary often helps when there are many of these parts. Alright, now that you are prepared, make some noise!

1.02.2012

Distortion Explained Part 2

Distortion Explained Part 2
Part 2 of this article covers the differences between various types of guitar distortions - Overdrives, Fuzz, hi-gain and more. Part 1 is here.


Distortion Pedals

Overdrive/Crunch

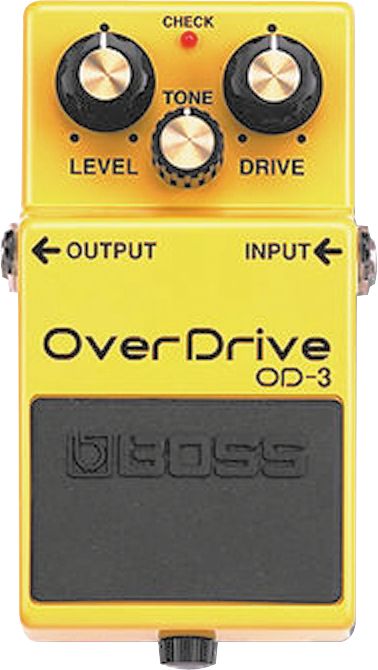
boss_od-3Some distortion effects provide an “overdrive” effect. Either by using a vacuum tube, or by using simulated tube modeling techniques, the top of the wave form is compressed, giving a smoother distorted signal than regular distortion effects. When an overdrive effect is used at a high setting, the sound’s waveform can become clipped, which imparts a gritty or “dirty” tone, which sounds like a tube amplifier “driven” to its limit. Used in conjunction with an amplifier, especially a tube amplifier, driven to the point of mild tonal breakup short of what would be generally considered distortion or overdrive, or along with another, stronger overdrive or distortion pedal, these can produce extremely thick distortion. Today there is a huge variety of overdrive pedals including the Boss OD-3 Overdrive.

Overdrive Distortion

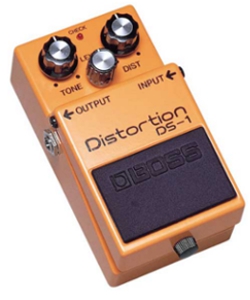
boss-distortion-pedal-ds-1Overdrive distortion is a well-known distortion. While the general purpose is to emulate classic “warm-tube” sounds, distortion pedals can be distinguished from overdrive pedals in that the intent is to provide players with instant access to the sound of a high-gain Marshall amplifier such as the JCM800 pushed past the point of tonal breakup and into the range of tonal distortion known to electric guitarists as “saturated gain.” Some guitarists will use these pedals along with an already distorted amp or along with a milder overdrive effect to produce radically high-gain sounds. Although most distortion devices use solid-state circuitry, some “tube distortion” pedals are designed with preamplifier vacuum tubes. In some cases, tube distortion pedals use power tubes or a preamp tube used as a power tube driving a built-in “dummy load.”
The Boss DS-1 Distortion is a solid state overdrive distortion pedal.

Fuzz

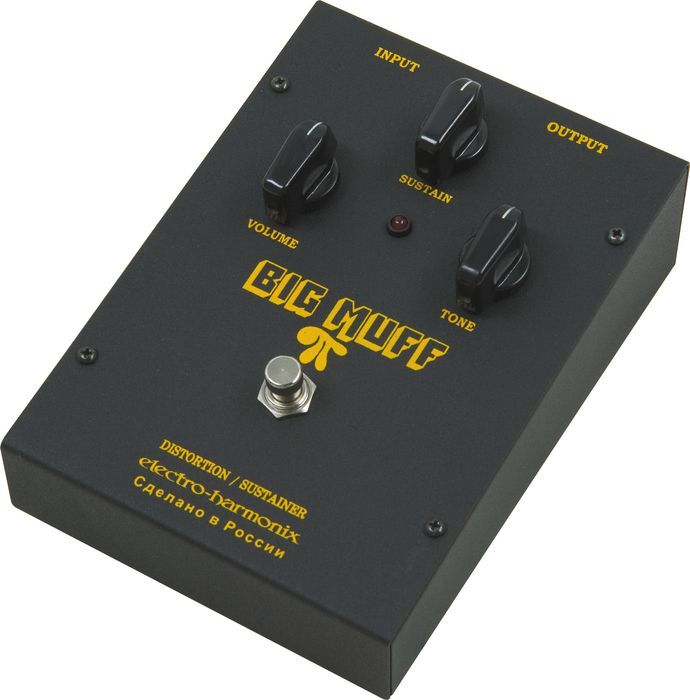
ehbigmuffrussiaFuzz was originally intended to recreate the classic 1960’s tone of an overdriven tube amp combined with torn speaker cones. Oldschool guitar players would use a screwdriver to poke several holes through the the guitar amp speaker to achieve a similar sound. Since the original designs, more extreme fuzz pedals have been designed and produced, incorporating octave-up effects, oscillation, gating, and greater amounts of distortion. The Electro-Harmonix Big Muff is a classic fuzz pedal.

Hi-Gain

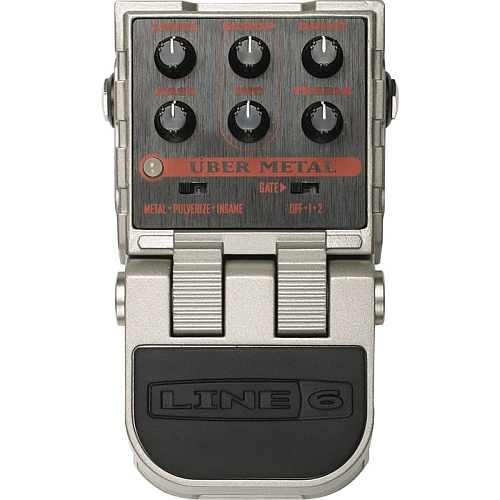
line6_ubermetalHi-Gain is the sound most used in Heavy metal. High gain in normal electric guitar playing simply references a thick sound produced by heavily overdriven amplifier tubes, a distortion pedal, or some combination of both–the essential component is the typically loud, thick, harmonically rich, and sustaining quality of the tone. However, the Hi-Gain sound of modern pedals is somewhat distinct from, although descended from, this sound. The distortion often produces sounds not possible any other way. Many extreme distortions are either hi-gain or the descendants of such.
An example of a hi-gain pedal is the Line 6 Uber Metal

Power-tube pedal

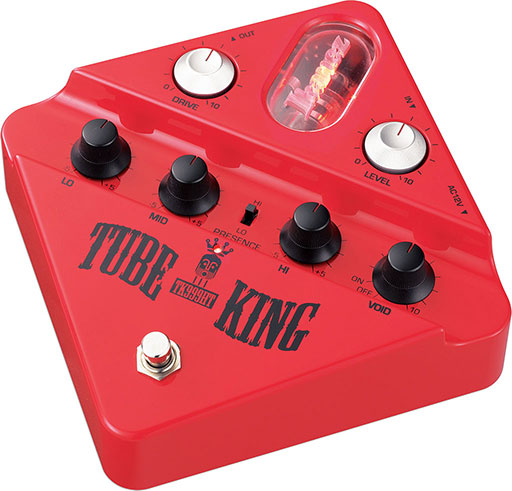
Ibanez-Tube-KingPower tube distortion is a unique kind of saturation when tube amps output stages are overdriven, unfortunately this kind of really powerful distortion only happens at high volumes. A Power-Tube pedal contains a power tube and optional dummy load, or a preamp tube used as a power tube. This allows the device to produce power-tube distortion independently of volume.
An example of a tube based distortion pedal is the Ibanez Tube King
 

Another way to distort

Digital Wave Shaping

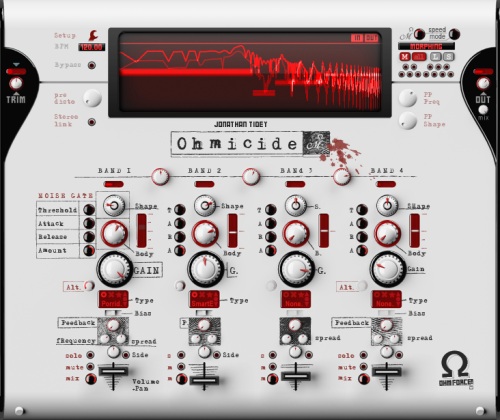
ohmicideThe word clipping in recording is usually a bad thing. And generally it is, unless we’re trying to distort something on purpose. In the digital world we can use powerful wave shaping tools to drastically distort and manipulate a sound. Rather than subject you to the technical explanation of how it works, just listen to Nine Inch Nails, they use this a lot. It’s perfect for really harsh, aggressive, unnatural and broken sounds. The Ohmforce Ohmicide plugin is an example of this style.

Why Is This Important?

Alright, so why did I just explain those different types of distortion sounds? Because knowing those sounds can help you be a better musician, engineer and producer. It will help you make decisions on what gear to purchase and what is appropriate for a song.

What Else?

Besides guitar what else is distortion good for? Well, pretty much anything, as long as it’s appropriate for the song.
  • Slight distortion can make something sound more exciting, too much can sometimes make it really tiny sounding.
  • When recording electric guitars, you can get a way bigger sound by using less gain and recording the same part multiple times, double or quad-tracking.
  • Distortion can sound really cool on drums, but you may have to heavily gate the drums, the sustain can get out of control.

12.16.2011

Distortion Explained Part 1

Distortion Explained Part 1

It is hard to think about the sound of an electric guitar without thinking about distortion. There was a time when electric guitars were always clean. Hard to imagine now.
Traditionally distortion was an unwanted feature in amplifier design. Distortion only occurred when the amp was damaged or overdriven. Possibly the first intentional use of distortion was in the 1951 recording of “Rocket 88″ By Ike Turner and the Kings of rhythm.
Chuck Berry liked to use small tube amps that were easy to overdrive for his trademark sound and other guitarists would intentionally damage their speakers by poking holes in them, causing them to distort.
Leo Fender then started designing amps with some light compression and slight overdrive and Jim Marshall started to design the first amps with significant overdrive. That sound caught on quickly and by the time Jimi Hendrix was using Roger Mayer’s effects pedals, distortion would forever be associated with the electric guitar.

Not just for guitars
When you're recording and mixing, you can use a bit of distortion to give any sound more edge, grit, energy and excitement. Drums, vocals, bass, samples - they can all benefit from a touch of distortion at times. Understanding the different ways distortion can be created and how they sound can help you get better sounds and make better recordings.


So What Is Distortion?

The word distortion means any change in the amplified waveform from the input signal. In the context of musical distortion this means clipping the peaks off the waveform. Because both valves and transistors behave linearly within a certain voltage region, distortion circuits are finely tuned so that the average signal peak just barely pushes the circuit into the clipping region, resulting in the softest clip and the least harsh distortion. Because of this, as the guitar strings are plucked harder, the amount of distortion and the resulting volume both increase, and lighter plucking cleans-up the sound. Distortion adds harmonics and makes a sound more exciting.

Amp Distortion


Valve Overdrive

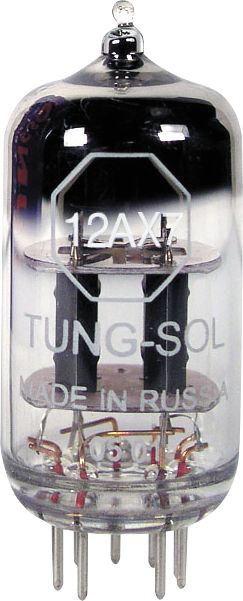
368322Before transistors, the traditional way to create distortion was with vacuum valves also known as vacuum tubes. A vacuum tube has a maximum input voltage determined by its bias and a minimum input voltage determined by its supply voltage. When any part of the input waveform approaches these limits, the valve’s amplification becomes less linear, meaning that smaller voltages get amplified more than the large ones. This causes the peaks of the output waveform to be compressed, resulting in a waveform that looks “squashed”. This is known as “soft clipping”, and generates even-order harmonics that add to the warmth and richness of the guitar’s tone. If the valve is driven harder, the compression becomes more extreme and the peaks of the waveforms are clipped. This adds additional odd-order harmonics, creating a “dirty” or “gritty” tone.
Valve distortion is commonly referred to as overdrive, as it is achieved by driving the valves in an amplifier at a higher level than can be handled cleanly. Multiple stages of valve gain/clipping can be “cascaded” to produce a thicker and more complex distortion sound. In some modern valve effects, the “dirty” or “gritty” tone is actually achieved not by high voltage, but by running the circuit at voltages that are too low for the circuit components, resulting in greater non-linearity and distortion. These designs are referred to as “starved plate” configurations.

Transistor Clipping
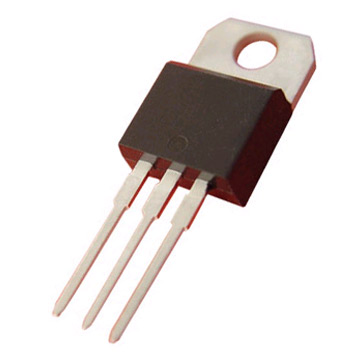
darlington_transistorTransistor clipping stages, on the other hand, behave far more linearly within their operating regions, and faithfully amplify the instrument’s signal until the input voltage falls outside its operating region, at which point the signal is clipped without compression, this “hard clipping” or limiting. This type of distortion tends to produce more odd-order harmonics. Electronically, this is usually achieved by either amplifying the signal to a point where it must be clipped to the supply rails, or by clipping the signal across diodes. Many solid state distortion devices attempt to emulate the sound of overdriven vacuum valves.
So that is basically how Tube and Solid state amps create distortion. Let’s talk about some different types of distortion sounds as found in effects pedals.

Tape Saturation

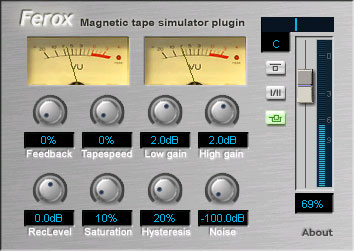
feroxAnother way to create distortion is with magnetic tape. Magnetic tape has a natural compression and saturation when you send it a really hot signal. Even today, many artists of all genres prefer analog tape’s “musical”, “natural” and especially “warm” sound. Due to harmonic distortion, bass can thicken up, creating the illusion of a fuller-sounding mix. In addition, high end can be slightly compressed, which is more natural to the human ear. It is common for artists to record to digital and re-record the tracks to analog reels for this effect of “natural” sound. While recording to analog tape is likely out of the home studio budget, there are tape saturation plugins that you can use while mixing that simulate the effect quite well. Most tape saturation effects are modeling both the magnetic tape and overloading of electronics.

Part 2 will cover the differences between various types of guitar distortions - Overdrives, Fuzz, hi-gain and more.

12.05.2011

Featured Equipment Of The Week: KRK ERGO System

KRK ERGO System
Room correction system and professional quality monitor controller.

A great mix starts with a great recording room. But when it comes to achieving the most accurate mix, your room may have the upper hand. Like any room, your studio's acoustics include offending frequencies and room reflections, and none of these are helping your mix. Getting a handle on these problems has traditionally meant the installation of soft foam or fabrics, and that's a great start. But now you can get even closer to a perfect room, and a perfect mix, because the future of studio sound is here, and it's called ERGO.
Read all the details: KRK ERGO Monitor controller and Room correction system


TOP FEATURES
  • Large Volume Knob: Digitally controlled analog volume control simultaneous control of ERGO's A/B/Sub outputs.
  • "A" Speakers: Enables or disables the audio being sent to the "A" speakers.
  • "B" speakers: Enables or disables the audio being sent to the "B" or subwoofer speakers.
  • Focus / Global / Bypass: Our 3D model allows users to preserve the "good" features of the room, while correcting the bad. ERGO also doesn't color the sound or produce an artificial anechoic environment. Normally, ERGO corrects for your monitoring position. This gives you perfectly corrected sound while mixing. In Global mode, the correct spot is widened so that others (producers, musicians, A&R) can enjoy your mix in a corrected environment.
  • Headphone Volume (side panel): Adjusts the output level of the headphone jack. The headphones output mirrors the selected monitor outputs.
  • Calibration Switch (back panel): This enables the room calibration microphone and places ERGO into analysis mode.
Buy KRK ERGO in the Revolution Audio online store

12.01.2011

Noise Gates Explained

Noise Gates Explained
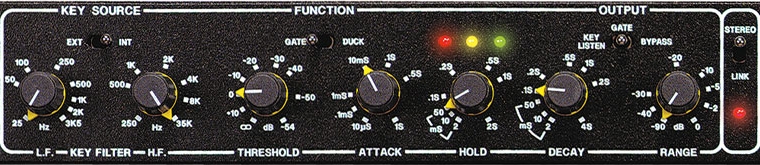
A noise gate is a form of dynamics processing used to increase dynamic range by lowering the noise floor. A gate is an excellent tool for removing hum from an amp, cleaning up drum tracks between beats, background noise in dialog, and can even be used to reduce the amount of reverb in a recording.


Parameters

The common parameters for a noise gate are:
Threshold – sets the level that the gate will open, when the signal level drops below the threshold the gate closes and mutes the output
Attack – how fast the gate opens
Hold – how long before the gate starts to close
Release – aka Decay, how long until the gate is fully closed again
Range – how much the gated signal will be attenuated
Sidechain – the sidechain is for setting an alternate signal for the gate to be triggered from, sometimes called a Key
Filters – the filters section allows you to fine tune the sidechain signal.

What’s It For?

The normal use for gating is for removing background noise. An essential tool for clean dialog recording.
Some other uses for gates are gated reverb and using the sidechain to activate other effects.

How To Set A Noise Gate

To setup a gate properly, start with the the attack, hold, and release as fast as possible. Set the range to maximum, and the threshold to 0dB.
Start lowering the threshold until the sound starts to get chopped up by the gate. Slow down the attack time to remove any unnatural popping. Adjust the hold and release times to get a more natural decay.
If you don’t want the background noise to be turned down as much then you can reduce the range control.

Other Uses

Gated reverb was a popular effect in the 80s, mostly because of Phil Collins records.
To set it up, take your drum tracks and send them to a stereo reverb with a large room preset.
After the reverb insert a stereo gate. Adjust the gate settings so that the reverb is cut off before then next hit.
In this example you’ll hear the unprocessed drums, then with reverb, then adding the gate. Listen

Favorite Gates

The classic Drawmer DS201 is a hardware noise gate that is hard to beat.
The gate on the Waves SSL E-Channel is good, simple and effective.
The free ReaGate VST is quite good as well.
Noise gates aren’t very much fun to talk about, but they are a powerful tool that you need to know how to use.

11.28.2011

Featured Equipment Of The Week: Primacoustic Stratus Acoustic Cloud

Primacoustic Stratus Acoustic Cloud
The Primacoustic Stratus is an acoustical device that suspends above the recording console to control early reflections, flutter echo and help eliminate standing waves that cause resonant peaks in the critical mix position. Once in place, you will immediately enjoy a more controlled and intimate acoustic environment, larger sweet spot and reduced ear fatigue.
Find out more | Primacoustic Stratus Acoustic Cloud $199
TOP FEATURES
  • Suspends over the console or listening position
  • Attractive fabric wrapped glass wool panel
  • Easy to assemble suspension hardware
  • Eliminates floor to ceiling reflections
Buy Primacoustic Stratus Acoustic Cloud at Revolution Audio

11.14.2011

Delay Effects Explained

Delay Processors

In it’s simplest form, a delay is made up of very few components.
An audio input, a recording device, a playback device and an audio output.

Tape Delay

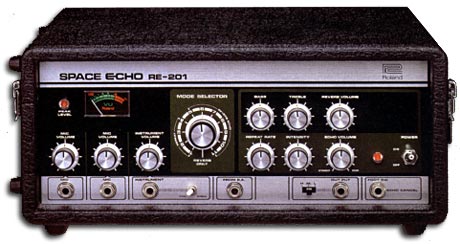
Early delay processors, such as the Echosonic, Echoplex and the Roland Space Echo, were based on analog tape technology. They used magnetic tape as the recording and playback medium. Some of these devices adjusted delay time by adjusting the distance between the playback and record heads, and others used fixed heads and adjustable tape speed.

Analog Delay

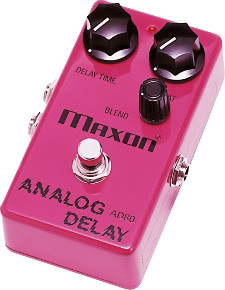
Analog delay processors became available in the 70s and used solid state electronics as an alternative to the tape delay.

10.31.2011

Compressors Explained

Compression is a form of Dynamics processing which is any device that preforms automatic gain changes. Other Dynamics processors are Noise Gates, Maximisers, and De-Essers.

A 'vintage' style software compressor

Compression

Compression is an effect that can take a while to understand because the results are not always as obvious as other effects. To explain it as simply as possible, when a signal goes into a compressor, it gets turned down. That’s it. How it does this, how fast, and smoothly is what makes each one unique.

10.15.2011

Reverb Explained

Digital Reverb Technology
There are two ways of creating a reverb effect in the digital world, by using mathematical calculations to create a sense of space, which is called Algorithmic. And by creating an impulse response, a snapshot of a real space, and applying that to the sound, which is called Convolution.
Reverb is essentially a series of delayed signals, and Algorithmic reverbs work pretty well to recreate this. Most reverb plugins, stomp boxes, and racks are algorithmic style.

9.15.2011

Productivity tips for home recordists


Often our time to work or play in the studio is limited. There is nothing more frustrating to leave the studio feeling like you've got nothing accomplished. In this article I'll share some productivity tips that I use in my studio.
Don't blame the computer, it's your short attention span!

Remove distractions
If you find that you're spending more time on Twitter and Facebook than actually working on music, UNPLUG from the internet! Sometimes signing out and closing the browser isn't enough.  I do this when I really have to get something done on a deadline, otherwise it easily takes 5X longer. This will help avoid the urge to look online for new samples or plugins or DAW updates.
Next, turn off your cellphone or leave it in another room. It's just a good habit to get into. Besides being a potential distraction, a ringing phone can interrupt a recording and cell phones often cause interference in mics and guitar pickups.
Some people thrive in chaos. For me, a messy workspace is a distraction. I don't need anything on my desk except keyboard, mouse, and a cup of coffee or water. I like to do a 30 second clean up of my desk by taking a cardboard box and tossing everything I won't need into it. The box goes into the closet. Amazingly more than half this stuff never comes out of the box again.

Have a goal
If you go into the studio without a purpose, you probably won't accomplish anything. The goal doesn't have to be big, in fact it's better to have many smaller goals because it feels good to start and complete a task. Goals like "I'm going to learn Song X"; "I'm going to record all the vocals for my newest song"; or even "I'm going to play with this new synth plugin." It's ok to spend time learning a new technique or plugin, just try to keep the experiments separate from your 'work time'.

Be prepared
Make some songwriting templates so that you can get right into recording when inspiration happens. If you already have a bunch of songs recorded, you can remove all the audio files and save it as a template. Think about how much time you just saved!
A template for a heavy metal song would be something like 1 instrument track for virtual drums (already set to an appropriate metal preset), 3 audio tracks for guitars (panned Left, Right, Center) with high-gain amps on each and a 1/16th note delay on Center track, 1 audio track for bass, 2 audio tracks for vocals (with compression), 1 reverb bus.
An electronic music template could be several instrument tracks with your favorite synths on each and a few FX buses with your favorite presets.
Before you sit down to mix, make sure all the distracting timing and pitch issues are taken care of and all extraneous noises are removed. If you are going to replace some of the drums with samples, set up a few options ahead of time so when you're mixing, you're ONLY mixing, not editing and mixing.

Schedule breaks
This might seem a bit weird, but I've found this technique to be really effective, especially at crunch time on a project. I set a timer for 25 minutes, I work non-stop until the timer goes off. I do something else for no longer than 5 minutes. Then set the timer for another 25 minutes. After 4x 25 minute segments I break for 30 minutes. On the breaks you don't want to do anything that would fatigue you further. Washroom, snack, check Twitter, or just relax your eyes and ears. It really works!

What is YOUR distraction in the home studio?

8.15.2011

Fixing Small Studio Acoustics Problems

This weekend I moved my home studio from one room to another. From a nearly 200 square foot living room to a 100 square foot bedroom. It's been a long time since I've thought about room acoustics and because this is a common situation for home studios, I thought I'd share my experience.
This article will help you understand and overcome the challenges of a dedicated studio in a small room. It will be most helpful to those with symmetrical rooms (no weird angles) and to those that don't need all the usual bedroom stuff, at the very least it will be a starting point to making the best of the situation.

Corner bass trap and broadband absorbers plus foam above.
 The Problems
Small rooms are more likely to have acoustic problems than larger ones, primarily flutter echo, room modes and early reflections that are too short. In my room, I knew there was a very bad flutter echo problem and room modes may be a problem but were predictable. The room is symmetrical also which was an advantage the old room didn't have. The measurements are approximately 11ft long x 9ft wide x 8ft tall. There is a door and a closed on the back wall and 6 x 4 window on the front wall.

6.24.2011

Revolution Audio Indie Musician E-Mixing Service

Revolution Audio has been supporting Canadian Independent Musician for years by providing quality, affordable recording equipment; production classes; articles, tips and advice. Revolution Audio is proud to announce our new E-Mixing service. Coast to coast and worldwide, professional mixing is now available for your home studio recording.


The cost for this service is $100/song. This price will go up to $150/song at the end of summer.

For more information click here: Indie Musician E-Mixing