Pages

Search This Blog

Showing posts with label effects. Show all posts

11.02.2012

Mixing Acoustic Guitars


Acoustic guitars are one of the most dynamic and expressive instruments used in modern music. They have a broad frequency range covering almost the entire audible spectrum. The instrument can serve many different roles in an arrangement as a harmonic, melodic, or percussive element. All of these factors will affect how you approach both the recording and mixing acoustic guitars.

Context
The first thing to do is think about its role in the song/mix. Is the guitar the main harmonic instrument? Is it supposed to enhance or thicken other harmonic instruments like electric guitars? Is it enhancing the melody, playing arpeggios or single notes? Is it a percussive element more like a shaker just to fill out the rhythm section? Figure out the goal, then you can begin processing.

Tone control
Depending on the guitar, microphone, pick, player and role in the arrangement, acoustic guitars always require at least a little equalization to fit in a mix. Cutting of nonmusical sub frequencies (everything below 100Hz) is a must. A low shelf may be required to tame the remaining low-end. In the midrange, take out any unflattering frequencies causing 'boxiness' or anything that might mask the vocals. A broad, gentle high shelf boost can enhance articulation and an overall more sparkly sound. The general strategy is to remove what you don't need, then enhance what you do.

Dynamics
An acoustic guitar performance is often extremely dynamic, which is often a problem. A compressor will even out the differences between loud and soft notes and help keep the level more constant throughout the track. It's easy to take it too far, so keep the gain reduction to no more than 3-4dB. The compressor's attack control will allow you to clamp down on the beginning of the notes, or when set slower (about 20-50ms) will enhance the transient which helps it stand out more in the mix.

At this point you may want to adjust the sound envelope further though use of a transient shaper. This tool can increase or decrease pick attack, and separately adjust sustain.

Depth
Sending your acoustic track(s) into a stereo reverb will add space and distance to the sound. The trick here is to not wash out the sound in a ton of reverb, but just to move the move the mics back a bit into an imaginary room. Usually, a short room type verb with the highs rolled off is the best bet. Try to make the reverb sound like an office or large bedroom - short decay with and a bit of early reflections. The predelay control will separate your source from the room.


Summary
And so, following the above strategy you should now have an acoustic guitar track with a balanced frequency response, even dynamics and sense of space around the instrument, (if that was what the track required). The track is ready to be put in the mix with the other instruments. Tweak the EQ in context with the other tracks, adjust the reverb send amount, and even EQ the reverb if needed.

Examples
Acoustic Raw
Acoustic Processed

3.01.2012

Modulation Effects Explained

Modulation Effects Explained
Modulation effects are a great way to create movement within a mix. This article will explain the different types of modulation effects available for mixing.

  1. Tremolo
  2. Vibrato
  3. Flanging
  4. Phase Shifting or Phasing
  5. Chorus

All of these effects are built around a Low Frequency Oscillator more commonly referred to as just an LFO. An LFO is an audio signal usually less than 20Hz that creates a pulsating rhythm rather than an audible tone. These are used for manipulate synthesizer tones, and as you will see, to create various modulation effects. All the effects listed use Sine wave as the waveshape for the LFO.

2.16.2012

Using Guitar Pedals For Mixing

Today I have a quick tip that can make mixing a lot of fun.
Use guitar pedals for mixing

Plugins are great but its just not the same as running sounds through real analog circuits. You can send sounds out of your audio interface, tweak the pedal settings and even 'play' the pedal to do realtime automation. It can be a lot of fun to work this way.

For the demonstration I've recorded an electric guitar directly into my DAW with Amplitube for amp and cabinet simulation. I'm going to then run the signal through an Electro-Harmonix Memory Boy analog delay pedal.

Here is the sound of the direct guitar.
Direct Guitar
Here is the guitar with the Amplitube plugin added (stereo, amp+speaker+mic)
Guitar + Amplitube

Now I'm going to run the sound through the pedal. To do this in your home studio you need an audio interface with a couple spare analog outputs, if your interface has 4 analog outputs, that's perfect.
Connect a guitar cable from output 3 of the interface to the input of the pedal. Connect the ouput of the pedal to one of the instrument inputs of your interface (usually in 1 or 2). In this case, I'm going from output 5 through the Memory Boy and into input 1 of my Profire 2626.

In the DAW you need to tell the signal where to go. Most DAWs will have a plugin for hardware inserts. In this next example I have the hardware insert before the amp, just like if I had the pedal before the amp. When you do this remember to keep the mix control of the pedal to about 50% or less, you still want to have the clean guitar get through.
Hear how it sounds with the delay before the amp
Guitar + analog delay insert

There's another way to use pedals and that's as a separate FX track. Add a new mono track to your project. You can either use the the hardware insert plugin again and have the other tracks send to this track, or set the track to monitor the analog input and have the other tracks send to the analog output.

Here I have the guitar track sending to my delay track, which has the hardware insert plugin set the same as before. The direct guitar signal goes into amp plugin, then to the master output. The signal from this track is also going to the delay track. It then goes into the insert plugin, out the interface, into the delay, (set to 100% wet, no clean sound) and then into the interface and to the same track. I hope this makes sense. The benefit of doing it this way is you can blend in as much of this signal as you want. You can also use plugins before and after to shape the sound independently of the original tracks. Also, you can send multiple tracks in at the same time.

Here is the guitar through the delay as a send. (delay after the amp in the chain)
Guitar + Delay Send

And finally, here is what the delay track sounds like soloed.
Delay Return Soloed

I hope this has been helpful.

1.02.2012

Distortion Explained Part 2

Distortion Explained Part 2
Part 2 of this article covers the differences between various types of guitar distortions - Overdrives, Fuzz, hi-gain and more. Part 1 is here.


Distortion Pedals

Overdrive/Crunch

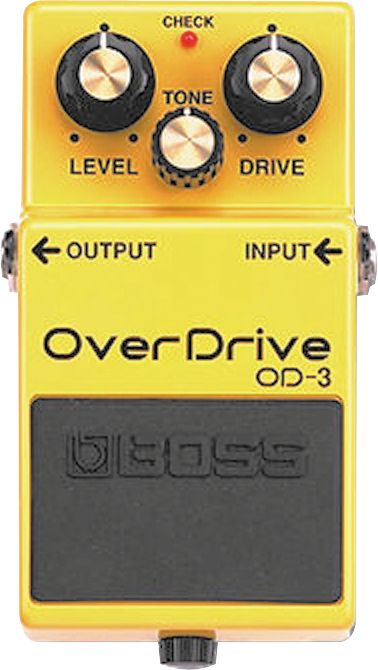
boss_od-3Some distortion effects provide an “overdrive” effect. Either by using a vacuum tube, or by using simulated tube modeling techniques, the top of the wave form is compressed, giving a smoother distorted signal than regular distortion effects. When an overdrive effect is used at a high setting, the sound’s waveform can become clipped, which imparts a gritty or “dirty” tone, which sounds like a tube amplifier “driven” to its limit. Used in conjunction with an amplifier, especially a tube amplifier, driven to the point of mild tonal breakup short of what would be generally considered distortion or overdrive, or along with another, stronger overdrive or distortion pedal, these can produce extremely thick distortion. Today there is a huge variety of overdrive pedals including the Boss OD-3 Overdrive.

Overdrive Distortion

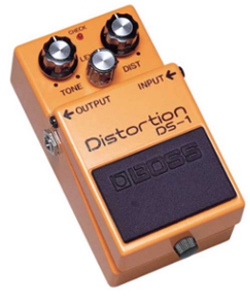
boss-distortion-pedal-ds-1Overdrive distortion is a well-known distortion. While the general purpose is to emulate classic “warm-tube” sounds, distortion pedals can be distinguished from overdrive pedals in that the intent is to provide players with instant access to the sound of a high-gain Marshall amplifier such as the JCM800 pushed past the point of tonal breakup and into the range of tonal distortion known to electric guitarists as “saturated gain.” Some guitarists will use these pedals along with an already distorted amp or along with a milder overdrive effect to produce radically high-gain sounds. Although most distortion devices use solid-state circuitry, some “tube distortion” pedals are designed with preamplifier vacuum tubes. In some cases, tube distortion pedals use power tubes or a preamp tube used as a power tube driving a built-in “dummy load.”
The Boss DS-1 Distortion is a solid state overdrive distortion pedal.

Fuzz

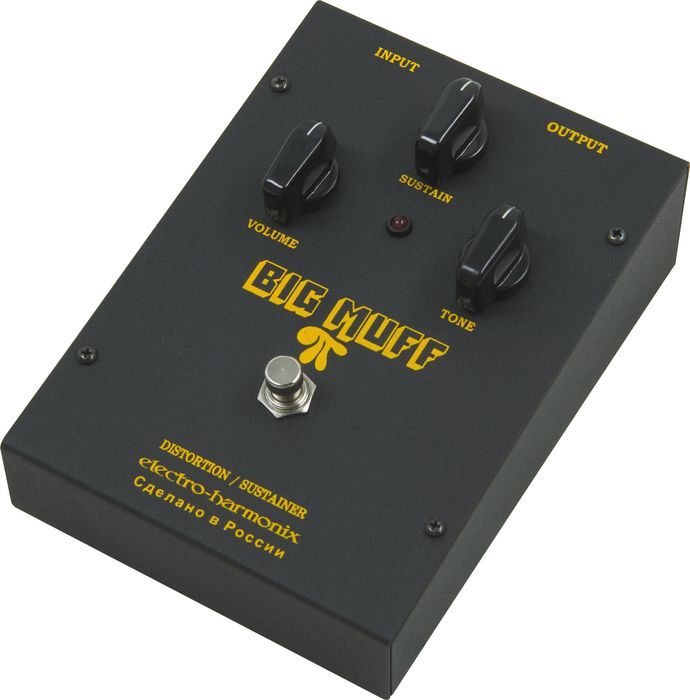
ehbigmuffrussiaFuzz was originally intended to recreate the classic 1960’s tone of an overdriven tube amp combined with torn speaker cones. Oldschool guitar players would use a screwdriver to poke several holes through the the guitar amp speaker to achieve a similar sound. Since the original designs, more extreme fuzz pedals have been designed and produced, incorporating octave-up effects, oscillation, gating, and greater amounts of distortion. The Electro-Harmonix Big Muff is a classic fuzz pedal.

Hi-Gain

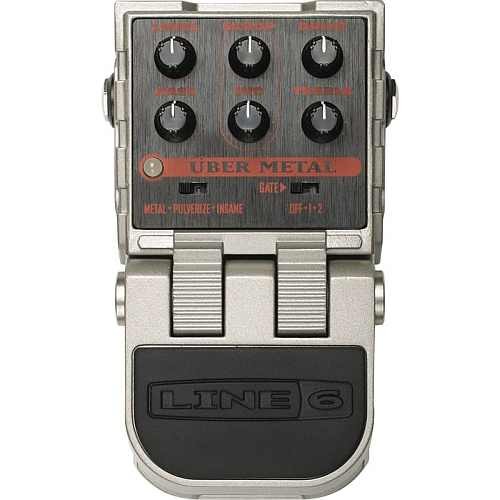
line6_ubermetalHi-Gain is the sound most used in Heavy metal. High gain in normal electric guitar playing simply references a thick sound produced by heavily overdriven amplifier tubes, a distortion pedal, or some combination of both–the essential component is the typically loud, thick, harmonically rich, and sustaining quality of the tone. However, the Hi-Gain sound of modern pedals is somewhat distinct from, although descended from, this sound. The distortion often produces sounds not possible any other way. Many extreme distortions are either hi-gain or the descendants of such.
An example of a hi-gain pedal is the Line 6 Uber Metal

Power-tube pedal

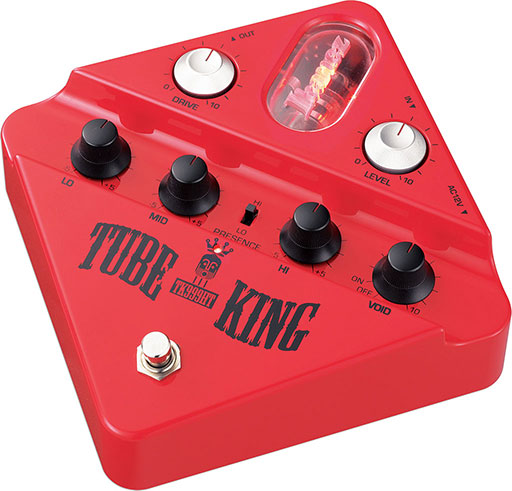
Ibanez-Tube-KingPower tube distortion is a unique kind of saturation when tube amps output stages are overdriven, unfortunately this kind of really powerful distortion only happens at high volumes. A Power-Tube pedal contains a power tube and optional dummy load, or a preamp tube used as a power tube. This allows the device to produce power-tube distortion independently of volume.
An example of a tube based distortion pedal is the Ibanez Tube King
 

Another way to distort

Digital Wave Shaping

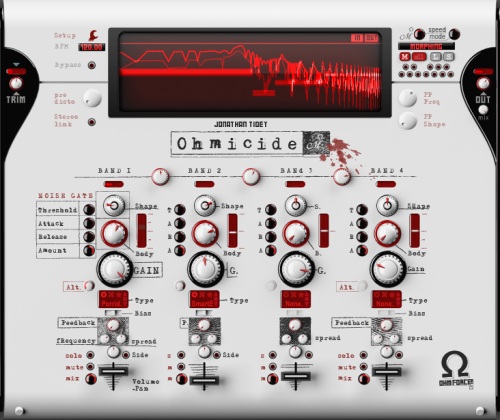
ohmicideThe word clipping in recording is usually a bad thing. And generally it is, unless we’re trying to distort something on purpose. In the digital world we can use powerful wave shaping tools to drastically distort and manipulate a sound. Rather than subject you to the technical explanation of how it works, just listen to Nine Inch Nails, they use this a lot. It’s perfect for really harsh, aggressive, unnatural and broken sounds. The Ohmforce Ohmicide plugin is an example of this style.

Why Is This Important?

Alright, so why did I just explain those different types of distortion sounds? Because knowing those sounds can help you be a better musician, engineer and producer. It will help you make decisions on what gear to purchase and what is appropriate for a song.

What Else?

Besides guitar what else is distortion good for? Well, pretty much anything, as long as it’s appropriate for the song.
  • Slight distortion can make something sound more exciting, too much can sometimes make it really tiny sounding.
  • When recording electric guitars, you can get a way bigger sound by using less gain and recording the same part multiple times, double or quad-tracking.
  • Distortion can sound really cool on drums, but you may have to heavily gate the drums, the sustain can get out of control.

12.26.2011

Featured Equipment Of The Week: Radial Bones Guitar Effects Pedals

Bones™ - Built for players that LOVE great tone! Bone's represent the evolution of the solid state pedal with low-noise 'Tonebone' circuits, pop free electronic switching and tough 14-guage steel construction.


There are 5 pedals in the Bones line: London Distortion; Hollywood Distortion; Vienna Chorus; Texas Overdrive; Twin City ABY switcher.

Check out the Radial Bones pedals and more at Revolution Audio

Hollywood Dual Distortion
  • Variable drive gain distortion
  • Modeled after 'American' tube amps
  • Dual mode for clean, rhythm & lead
London Dual Distortion
  • Multi-stage high gain distortion
  • Modeled after 'British Plexi' half stack
  • Dual mode for clean, rhythm & lead
Texas Dual Overdrive
  • Variable overdrive and tone
  • Vintage to extreme overdrive range
  • Dual mode for clean, rhythm & lead
Vienna Chorus
  • Old school analog bucket brigade chip
  • Dual channel for quick choral changes
  • Individual Rate and Depth for each chorus channel
Twin City ABY Switcher
  • Buffered ABY with Drag™ load correction
  • Isolated output eliminates hum and buzz
  • 180º polarity sets both amps in phase

Check out the Radial Bones pedals and more at Revolution Audio

12.16.2011

Distortion Explained Part 1

Distortion Explained Part 1

It is hard to think about the sound of an electric guitar without thinking about distortion. There was a time when electric guitars were always clean. Hard to imagine now.
Traditionally distortion was an unwanted feature in amplifier design. Distortion only occurred when the amp was damaged or overdriven. Possibly the first intentional use of distortion was in the 1951 recording of “Rocket 88″ By Ike Turner and the Kings of rhythm.
Chuck Berry liked to use small tube amps that were easy to overdrive for his trademark sound and other guitarists would intentionally damage their speakers by poking holes in them, causing them to distort.
Leo Fender then started designing amps with some light compression and slight overdrive and Jim Marshall started to design the first amps with significant overdrive. That sound caught on quickly and by the time Jimi Hendrix was using Roger Mayer’s effects pedals, distortion would forever be associated with the electric guitar.

Not just for guitars
When you're recording and mixing, you can use a bit of distortion to give any sound more edge, grit, energy and excitement. Drums, vocals, bass, samples - they can all benefit from a touch of distortion at times. Understanding the different ways distortion can be created and how they sound can help you get better sounds and make better recordings.


So What Is Distortion?

The word distortion means any change in the amplified waveform from the input signal. In the context of musical distortion this means clipping the peaks off the waveform. Because both valves and transistors behave linearly within a certain voltage region, distortion circuits are finely tuned so that the average signal peak just barely pushes the circuit into the clipping region, resulting in the softest clip and the least harsh distortion. Because of this, as the guitar strings are plucked harder, the amount of distortion and the resulting volume both increase, and lighter plucking cleans-up the sound. Distortion adds harmonics and makes a sound more exciting.

Amp Distortion


Valve Overdrive

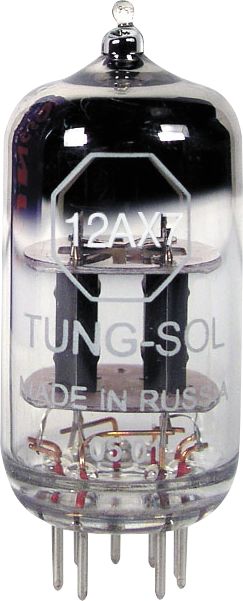
368322Before transistors, the traditional way to create distortion was with vacuum valves also known as vacuum tubes. A vacuum tube has a maximum input voltage determined by its bias and a minimum input voltage determined by its supply voltage. When any part of the input waveform approaches these limits, the valve’s amplification becomes less linear, meaning that smaller voltages get amplified more than the large ones. This causes the peaks of the output waveform to be compressed, resulting in a waveform that looks “squashed”. This is known as “soft clipping”, and generates even-order harmonics that add to the warmth and richness of the guitar’s tone. If the valve is driven harder, the compression becomes more extreme and the peaks of the waveforms are clipped. This adds additional odd-order harmonics, creating a “dirty” or “gritty” tone.
Valve distortion is commonly referred to as overdrive, as it is achieved by driving the valves in an amplifier at a higher level than can be handled cleanly. Multiple stages of valve gain/clipping can be “cascaded” to produce a thicker and more complex distortion sound. In some modern valve effects, the “dirty” or “gritty” tone is actually achieved not by high voltage, but by running the circuit at voltages that are too low for the circuit components, resulting in greater non-linearity and distortion. These designs are referred to as “starved plate” configurations.

Transistor Clipping
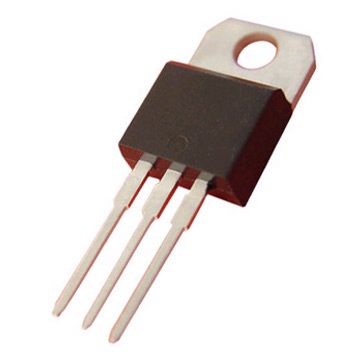
darlington_transistorTransistor clipping stages, on the other hand, behave far more linearly within their operating regions, and faithfully amplify the instrument’s signal until the input voltage falls outside its operating region, at which point the signal is clipped without compression, this “hard clipping” or limiting. This type of distortion tends to produce more odd-order harmonics. Electronically, this is usually achieved by either amplifying the signal to a point where it must be clipped to the supply rails, or by clipping the signal across diodes. Many solid state distortion devices attempt to emulate the sound of overdriven vacuum valves.
So that is basically how Tube and Solid state amps create distortion. Let’s talk about some different types of distortion sounds as found in effects pedals.

Tape Saturation

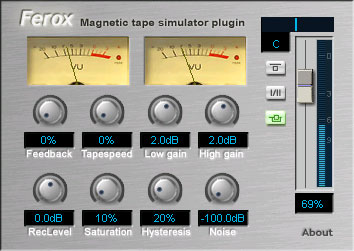
feroxAnother way to create distortion is with magnetic tape. Magnetic tape has a natural compression and saturation when you send it a really hot signal. Even today, many artists of all genres prefer analog tape’s “musical”, “natural” and especially “warm” sound. Due to harmonic distortion, bass can thicken up, creating the illusion of a fuller-sounding mix. In addition, high end can be slightly compressed, which is more natural to the human ear. It is common for artists to record to digital and re-record the tracks to analog reels for this effect of “natural” sound. While recording to analog tape is likely out of the home studio budget, there are tape saturation plugins that you can use while mixing that simulate the effect quite well. Most tape saturation effects are modeling both the magnetic tape and overloading of electronics.

Part 2 will cover the differences between various types of guitar distortions - Overdrives, Fuzz, hi-gain and more.

12.01.2011

Noise Gates Explained

Noise Gates Explained
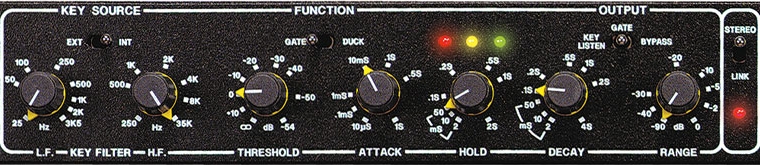
A noise gate is a form of dynamics processing used to increase dynamic range by lowering the noise floor. A gate is an excellent tool for removing hum from an amp, cleaning up drum tracks between beats, background noise in dialog, and can even be used to reduce the amount of reverb in a recording.


Parameters

The common parameters for a noise gate are:
Threshold – sets the level that the gate will open, when the signal level drops below the threshold the gate closes and mutes the output
Attack – how fast the gate opens
Hold – how long before the gate starts to close
Release – aka Decay, how long until the gate is fully closed again
Range – how much the gated signal will be attenuated
Sidechain – the sidechain is for setting an alternate signal for the gate to be triggered from, sometimes called a Key
Filters – the filters section allows you to fine tune the sidechain signal.

What’s It For?

The normal use for gating is for removing background noise. An essential tool for clean dialog recording.
Some other uses for gates are gated reverb and using the sidechain to activate other effects.

How To Set A Noise Gate

To setup a gate properly, start with the the attack, hold, and release as fast as possible. Set the range to maximum, and the threshold to 0dB.
Start lowering the threshold until the sound starts to get chopped up by the gate. Slow down the attack time to remove any unnatural popping. Adjust the hold and release times to get a more natural decay.
If you don’t want the background noise to be turned down as much then you can reduce the range control.

Other Uses

Gated reverb was a popular effect in the 80s, mostly because of Phil Collins records.
To set it up, take your drum tracks and send them to a stereo reverb with a large room preset.
After the reverb insert a stereo gate. Adjust the gate settings so that the reverb is cut off before then next hit.
In this example you’ll hear the unprocessed drums, then with reverb, then adding the gate. Listen

Favorite Gates

The classic Drawmer DS201 is a hardware noise gate that is hard to beat.
The gate on the Waves SSL E-Channel is good, simple and effective.
The free ReaGate VST is quite good as well.
Noise gates aren’t very much fun to talk about, but they are a powerful tool that you need to know how to use.

11.14.2011

Delay Effects Explained

Delay Processors

In it’s simplest form, a delay is made up of very few components.
An audio input, a recording device, a playback device and an audio output.

Tape Delay

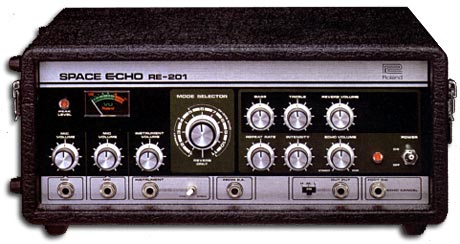
Early delay processors, such as the Echosonic, Echoplex and the Roland Space Echo, were based on analog tape technology. They used magnetic tape as the recording and playback medium. Some of these devices adjusted delay time by adjusting the distance between the playback and record heads, and others used fixed heads and adjustable tape speed.

Analog Delay

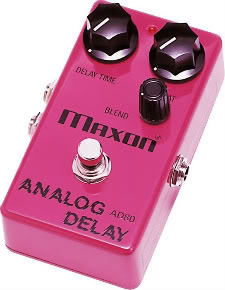
Analog delay processors became available in the 70s and used solid state electronics as an alternative to the tape delay.

4.13.2011

Pitch Correction With iZotope Nectar

iZotope Nectar is a brilliant mixing tool designed to handle all your vocal processing needs. Check out the video below for an overview of the auto and advanced pitch correction options in Nectar.


Buy iZotope Nectar in the Revolution Audio Online Store.

12.29.2010

Featured Equipment: TC-Helicon VoiceLive Touch

The first vocal processor and looper at your fingertips

Combining best-selling vocal effects, VLOOP™ performance vocal looping and a uniquely addictive ‘touch’ interface, VoiceLive Touch is truly the first instrument for your voice.


See all the details of the TC-Helicon VoiceLive Touch


A revolution in performance for every singer
VoiceLive Touch is the perfect companion for any vocalist whether you sing live or record in the studio. It can easily be mounted on a mic stand or put next to your computer or keyboard. It’s there when you need it for any situation.
  • Vocal harmony & effects
  • VLOOP™ – performance vocal looping of vocals and guitar input including effects
  • Instant touch interface with bright, easy to read, scrolling display
  • Ingenious design allows mic attachment and desktop use for easy access
See all the details of the TC-Helicon VoiceLive Touch